Pages

Tuesday, December 27, 2011

And All the Trimmings

Although I had guests to dinner for both Christmas and Boxing Day, the turkey event was on Boxing Day. I had ordered a free-range bronze turkey of almost 4 kilos and dry-brined it for three days before cooking. Since I discovered this technique several years ago, it's my go-to method of roasting poultry. The result was the best turkey I've ever eaten—moist, well-seasoned meat with lots of flavour.

But this blog is about a couple of the trimmings, specifically the gravy and the cranberry sauce. I stumbled upon Jamie Oliver's recipe for Get-Ahead Gravy and thought "that's a good idea"—less palaver before serving and knowing there is enough. I didn't have bacon and forgot about finishing with cranberry sauce, but even then, it was terrific. When making turkey gravy just before serving, it never gets to cook long enough and it doesn't get the extra vegetable flavour that this gravy gets. The recipe makes lots and there are leftovers that I'm going to freeze in small containers for those times I want a bit of gravy with the mashed potatoes.

The cranberry sauce was another hit. I made it last year too but made no notes about it. I paid special attention this year and I now declare my search for the perfect cranberry sauce at an end. This is lovely stuff, not too sweet, with a fairly pronounced citrus component, which I really like. In fact, it's actually a cranberry cumberland sauce.


Make-Ahead Poultry Gravy
This is slightly adapted from the original recipe. Based on comments and my own gut feeling, I reduced the amount of star anise. I also added a couple of garlic cloves. I think it was a good call. The resulting gravy has a hint of fennel/anise flavour but more would be overpowering. An alternative might be to include a quartered fennel bulb, but I didn't try this.

2 celery sticks, coarsely chopped
2 carrots,coarsely sliced
2 onions, peeled and quartered
2 cloves of garlic, smashed
5 bay leaves
5 sage leaves
4 sprigs of rosemary
1 star anise
2 rashers of bacon (I didn't have any, but I'm sure it would be great)
8 chicken wings
2-4 tablespoons olive oil salt and freshly ground black pepper
4 tablespoons flour
2 liters hot water
60ml sherry optional:
2 heaped tablespoons cranberry sauce, for finishing

  1. Preheat the oven to 200C (400F)
  2. Break the chicken wings open and pound them with a meat hammer or rolling pin to crack the bones open. (I put them in a plastic bag and used a rubber mallet.)
  3. Put the chopped vegetables, herbs, star anise,  bacon (if using)  and chicken wings in a roasting pan. Season with salt and pepper, drizzle with the olive oil, and stir it around to coat. 
  4. Bake for an hour until the meat is tender and falling off the bone.
  5. Put the roasting pan on low heat on top of the stove.
  6. Use a potato masher to mash everything up, squeezing as much flavour and juice out of everything as you can.
  7. Gradually add the flour, and continue to mash, stir and brown for 5-10 minutes.
  8. Add 2 liters of hot water to deglaze the pan, scraping all the browned bits up.
  9. Transfer everything to a large pot, bring to a boil for 10 minutes until the sauce has thickened, and then simmer uncovered for 25 minutes, stirring occasionally. The liquid will reduce by about half. 
  10. When it has reached the desired consistency, add the sherry, check and adjust the seasoning, then strain through a sieve into a large bowl. Mash as much stuff through the sieves as you can, then discard what remains.
  11. Let the gravy cool, pour into plastic containers or freezer bags, and freeze until the day you need it. 
  12. You can heat it and use it as is, or if you have roasted a bird, remove as much fat as you can from the roasting pan, and use the pre-made gravy to deglaze the pan. 
  13. Optionally, add some cranberry sauce and transfer to a pot to keep warm on low heat until use.

Cranberry Cumberland Sauce


  1. Grate the peel of a large orange and juice the orange.
  2. Combine the cranberries, port, orange juice, and sugar in a pan and cook over medium heat for about 10 minutes until the berries burst.
  3. Mix the cornstarch, mustard powder, and ground cloves with a small amount of the cranberry liquid to create a paste. Stir into the cranberries.
  4. Add the dried cranberries or raisins, almonds, orange and lemon rind
  5. Simmer for five minutes, season, and then chill. 

Monday, December 12, 2011

Golden Beet Salad

My Turkish greengrocer often has some surprising vegetables, and last week he was carrying something I had heard of but never seen locally—yellow beets. They look yellowy brown and indescript on the outside, but cut them open and they reveal gorgeous golden yellow flesh. The taste of the beets is, I think, less earthy and more subtle than the normal red variety.

I used a few of them to make beet soup, which was very tasty, but the yellow color faded and turned somewhat brownish. Maybe I cooked it too long.

The raw beet salad, however, was vibrant, fresh, and golden. It's super easy to make and could even turn beet haters into beet lovers.

Golden Beet Salad

This is inspired by a salad on Nigella Lawson's web site, made with red beets and dill (which I admit would be a great combo). However, I didn't have fresh dill on hand so I used parsley, and of course, my beets were yellow. The toasted mustard seeds add a slightly bitter note to the salad, balancing the sweetness of the beets, and the sour of the lemon juice. 

For an Asian-influenced variation, consider using cilantro (coriander leaf) and sweet wine vinegar to replace the parsley and lemon juice, with a bit of pickled ginger to garnish.

This serves two as an appetizer.

200 grams yellow beets (about 1 large beet)
2 tablespoons fresh lemon juice
3 tablespoons of finely chopped parsley
1 teaspoon fresh mint leaves, minced
1 teaspoon black mustard seeds
1 tablespoon extra virgin olive oil (However, I think a more neutral oil, or even no oil at all would make this salad even better.  )

  1. Use the julienne disc of your food processor to grate the beets, or you can just grate the beets using a box grater.
  2. Scoop it into a bowl and mix with the parsley, lemon juice, and oil.
  3. Toast the mustard seeds until they begin to pop, then add to the salad.
  4. Optionally, finish with a bit of flaky sea salt (like Maldon)

Saturday, December 10, 2011

Squash Stuffed with Couscous and Feta


Fall and winter bring lovely little squashes into the market. Most popular are orange-skinned ones with orange flesh, but there are green ones with yellow flesh too. I love them both, and in the past week have used them both. Their small size makes them perfect as a meal for two, especially when stuffed.  And when stuffed whole, there is a definite wow factor when they are brought to the table.

You can stuff them with anything—rice, bulgar, bread, vegetables, a bit of cheese. My choice this week was a couscous pilaf, flavoured with mushrooms and sage, with some feta cheese. It's a keeper.

Feta and Couscous Stuffed Squash

2 servings

This makes a stuffed squash with extra couscous pilaf to serve on the side. It is easy to prepare this dish ahead of time and then finish baking it just before serving.

1 small globe squash
1/2 cup couscous
3/4 cup boiling water
1 tablespoon olive oil
4 leaves sage, or 1/2 teaspoon dried
1 medium onion
1 celery stalk
1/2 sweet red or yellow pepper
150 grams mushrooms
1-2 garlic cloves
1/2 teaspoon thyme
50 grams feta cheese
  1. Preheat the oven to 350F/180C.
  2. Cut the top off the squash, and a small slice off the bottom so that it sits straight.
  3. Cut a hole in the top and scoop out all the seeds, then rub the insides with a bit of salt and pepper.
  4. Bake the squash (including its top) for 30-40 minutes until the flesh is cooked but the squash still retains it shape. This can be done a day in advance (in which case, cover it with plastic wrap and keep it in a cool place).
  5. Place the couscous in a bowl, pour boiling water over it, and cover with a lid or plate. Let sit for 15 minutes, then uncover and fluff it with a fork.
  6. While the couscous cooks, mince the onion, celery, pepper, mushrooms , and garlic. Because couscous is so fine, I like to chop the vegetables in a very small dice.
  7. In a large frying pan, fry the sage leaves in the olive oil for a few minutes until they turn crisp. Remove and reserve the leaves. (You can skip this step if you are using dried sage.)
  8. Add the onions and celery to the pan and cook for a few minutes until the onions are softened and translucent. Then add the garlic and mushrooms and cook for another few minutes, finishing with the red pepper. Crumble in the fried sage (or the dried sage), and add the thyme. Keep sautéing and stirring until the vegetables are cooked through. 
  9. In a bowl or in the frying pan,  mix the couscous and vegetables. Season with salt and pepper. 
  10. Using a small spoon, fill the squash with the couscous pilaf, firming it into the bottom and sides. Leave the center free, and push the feta cheese into it. If there's still some room, pack in some more pilaf. You will have pilaf left over, but you can reheat this an serve it as a side dish, perhaps with some extra feta cheese crumble over it.
  11. Bake the stuffed squash in a medium oven for another 30-40 minutes. (If you prepared it in advance with chilled ingredients, you will probably need to cook it for 45 minutes or so).
  12. Serve with a steamed green vegetable (green beans, broccoli, or, spinach), roasted tomatoes, and the rest of the pilaf. 

It looks so cute with its little caps on

Made with orange squash, it tasted even better.
Couscous pilaf is also great on its own as a side, or with some feta cheese


Monday, September 19, 2011

Tracking Recipes

I don't write up all the recipes I try, but that's not to say I don't have opinions about them or want to keep them accessible. If a recipe comes from a cookbook that I own or from a cooking blog I frequent, I will sometimes review it on Cookbooker, rather than blog about.

Not only is it a way to keep my own comments about a recipe, it gives me insight into what other people may have done with it, which can be quite helpful.

For a list of my recipe reviews, check out Barbara's Reviews.

Here's a list of some of the recipes I've tried and might make again with modifications:

Red Wine Chocolate Cake
Minestrone all Romagna
Cubed aubergine cooked with onions
Cauliflower with a cashew and sesame seed sauce
Curried cauliflower
Easiest Baked Macaroni and Cheese

Sunday, September 11, 2011

English Muffins

When I first moved to Holland there was a Marks and Spencers store in the Kalverstraat. I always found their clothes boring but they had a pretty good food section, and that was where I bought my English muffins. English muffins are unknown in Holland (except for the Egg McMuffin, perhaps), so when Marks and Sparks closed, I was bereft of one of my favourite breakfast foods.

Since then, I've had to rely on visits home to Canada for my EM fixes, and I've occasionally tried making them myself, with various recipes. Most of these seemed too bread-like and never achieved the chewy, porous texture of the commercial muffins I was used to. But I've found English Muffin valhalla with the following recipe. Using a yeast batter (not dough) and rings to keep the muffins in shape on the griddle, this is it!


English Muffins
I adapted this recipe from Alton Brown by using milk instead of hot water and milk powder, and swapping in 1 cup of whole wheat flour. Yields 8-10 muffins, depending on how much you fill the rings.

Equipment: 3-inch muffin rings, griddle or large heavy frying pan

1 cup milk
1 tablespoon butter
1 tablespoon sugar
1/2 teaspoon salt

1/3 cup lukewarm water
1/4 teaspoon sugar
2 1/2 teaspoons dry yeast
1 cup white flour
1 cup whole wheat flour

1/2 teaspoon salt
1/4 cup corn meal
  1. Scald the milk, then pour into a large bowl with the butter, sugar, and 1/2 teaspoon of salt. Stand and let cool to lukewarm.
  2. In a small bowl, mix the water, 1/4 teaspoon sugar, and the yeast and let stand until the yeast bubbles.
  3. Pour the yeast mixture into the cooled milk mixture.
  4. Add the flour and beat the batter for about 5 minutes. (I did this by hand because the original recipe called for this, but next time I'll try it with the mixer.)
  5. Cover the bowl with a tea towel and let stand for 30 minutes, until the batter begins to form bubbles.
  6. Add the remaining 1/2 teaspoon salt and beat into the batter.
  7. Heat a griddle or heavy frying pan. The original recipe suggested an electric frying pan set to 300F. I heated my cast iron frying pan on medium high and then turned it down to low for cooking the muffins. Because I was using the largest burner, I even used a flame spreader.
  8. Generously sprinkle the griddle with corn meal (or lightly oil the griddle), oil the insides of the muffin rings, and place the rings on the griddle.
  9. Using a small ladle, put the batter into the rings so that it about half fills the rings (it can come just over the half way point). (The rings in the picture are a bit over-filled.) The number of rings and the size of the griddle determine how many muffins you can cook at one time. I only had 2 rings, so it took a while. If you lightly oil the griddle (for example using an oil spritzer), the muffins are easier to turn but may burn more easily. Corn meal prevents the muffins from burning but tends to stick to the rings and makes it slightly harder to free them from the rings. 
  10. Cover with a large pot lid and let it bake cook for 4-6 minutes. The batter will rise to fill the ring completely.
  11. Turn the muffins over, cover, and cook for another 4-6 minutes.
  12. Remove the muffins from the rings and let cool, while you re-oil the rings and cook another batch of muffins, until the batter is gone.


To serve, prick the sides of the muffin all around with a fork, separate the halves, toast them, then put your favourite sweet or savory topping on them. I favour butter and honey, or sliced cheese and ginger marmelade. They are also great as tosties with tomato and cheese.

Tuesday, June 14, 2011

Roasted Vegetable Minestrone

I am about to head off to England for a few days and wanted to use up some of the vegetables I have lying around before I go. Since I also had some good chicken stock (made in the slow cooker from bones leftover from Slow Cooker Basque Chicken), soup was a logical idea.


The result is one of those wonderful serendipitous soups that deserves a repeat! Sweet from the onions, roasted tomatoes, and sweet potato, nicely warmed by the green chile, with underlying depth from the stock, with a hint of smokiness from the roasted peppers. 


Roasted Vegetable Minestrone
These are the vegetables I had on hand, but if you have 2 bell peppers of different colours, use those. The stock and roasted tomatoes produced a broth that was so good that I didn't add any herbs, but I might do if I was using a lighter stock.

500 grams tomatoes
2 tablespoons olive oil
1 green pepper (or other bell pepper)
2 yellow onions, sliced
3 fat cloves of garlic, minced
1 green serrano chili, seeded and finely sliced
1 sweet potato, diced in 1.5 cm cubes
4 cups homemade chicken stock (for example, from a roasted chicken)

  1. Preheat the oven to 220C/450F.
  2. Slice the tomatoes about 1 cm thick and lay the slices out on a baking sheet. Dribble half the olive oil over them, and season with salt and freshly-ground pepper. Bake in the oven for 15 minutes.
  3. Meanwhile char the green pepper over an open flame. (Alternatively, you could put the tomatoes and pepper under the broiler until the pepper is charred and the tomatoes caramelized. I haven't tried this though. ) Cover and let cool, then remove the skin. It's OK if a few charred bits remain. Chop into about 1.5 cm pieces.
  4. In a large heavy pot, heat the remaining olive oil, then sauté the onions, garlic, and chili for 2-3 minutes.  Added the roasted tomatoes and their juice, the chopped green pepper, and the sweet pepper. 
  5. Add the chicken stock, bring to a boil, then simmer for 20-30 minutes. Adjust the seasonings, and serve with some crusty bread.

Monday, June 13, 2011

Basque Chicken (Slow Cooker)

I made this thinking it would be a good alternative to coq au vin and a way to use a small organic soup chicken that I had in the fridge.

Despite the small size of the chicken, it was too big for all the pieces to fit easily in the slow cooker. Not to worry, I made a light chicken broth with the back, neck, and other bits that wouldn't fit.

The result was tasty but next time I will make some changes:
  • Use only chicken legs. This was a soup chicken, and with the long cooking it still remained fairly tough and stringy. And chicken breast always dries out.
  • Remove the skin from the chicken after browning and before adding it to the pot. I always remove the skin before eating anyway and wonder how much extra flavour it imparts.
Basque Chicken

4 chicken pieces (breast and legs), bone-in with skin
1 yellow onion, sliced
3 cloves garlic, minced
2 bell peppers, yellow and red, cut into large pieces
1 tablespoon butter
2 tablespoon peanut oil
1/2 cup  wine (red or white)
1 tablespoon tomato paste
1/2 teaspoon thyme
1/2 teasoon thyme
1  bay leaf
300 grams mushrooms, halved, whole, or in thick slices, depending on the their size
1 tablespoon butter
1 tablespoon oil
1 green onion, green and white parts, sliced
  1. Season the chicken with salt and pepper. Heat the butter and peanut oil in a large heavy frying pan over a medium-high flame.
  2. Brown the chicken, about 7 minutes per side, frying in batches to avoid overcrowding. Put the chicken pieces in the slow cooker.
  3. Now turn the heat down to medium and sauté the onion and garlic for a minute or so. Deglaze with the wine, stir in the tomato paste, then add it all to the slow cooker. Add the herbs and bell pepper pieces. 
  4. Cook on high for 6 hours.
  5. About 15 minutes before serving, heat the butter and oil in a large heavy frying pan, until the foam of the butter subsides.
  6. Add the mushrooms and stir and shake to get all of them  covered with the fat. All the fat will be absorbed, but as the mushrooms cook, they will release it again and start to brown.
  7. While the mushrooms are browning, transfer the chicken to a serving dish., then add the browned mushrooms and garnish with green onions.
  8. Serve over potatoes or noodles.

Baked Halibut with Mustard and Dill

There is a store in Amsterdam called Fishes which deals only in sustainably caught fish, usually with a MFC (Marine Stewardship Council) certificate. It's not in my neighbourhood, so I don't often get there, but this week I placed an order with Ruud Maaz and treated myself to a piece of halibut from Fishes. I had forgotten how good halibut tastes.

It can also handle somewhat stronger flavours. I had some leftover curried spinach (saag without the paneer) that I planned to eat with it, so I decided to bake it with a bit of Dijon mustard and dill, and topped with some tomato slices. Sprinkled a bit of lemon juice and olive oil over top, baked for 10-12 minutes. It was wonderful!

Saturday, June 11, 2011

Oatmeal Bread

I can sometimes get very discouraged about bread in Holland. There are a couple of good bakers in Amsterdam, such as Hartog and Vlaamsche Broodhuis, but most bread in supermarkets and even ordinary bakers is soft and squishy, no matter what the colour, grain, or the number of seeds in it.

So today I decided to make my own bread again. I dug into one of my new cookbooks and came up with Oatmeal Sandwich Bread. This recipe produces a very soft, sticky dough so it is not well suited to hand kneading. Instead, I put the apple-green machine to work.

The recipe calls for the mixed ingredients, except the salt, to rest for half an hour to autolyse. It lets the flour absorb more moisture and produce a moister loaf. It certainly seems to work, producing a large, flavourful loaf with a good crumb. It slices easily and does indeed work well for sandwiches.

The loaf is very large, rising well over the pan. I think I might split the dough into two smaller pans next time.

Oatmeal Sandwich Bread
Adapted from Good to the Grain

2 teaspoons active dry yeast
2 cups lukewarm water
3 tablespoons molasses (I used Zeeuwse stroop, which is as near as I can get here)
2 1/2 cups whole-wheat flour
2 cups all-purpose four
1 cup rolled oats (I had a mixture of fine and large rolled oats)
2 ounces butter, melted
1 teaspoon salt
  1. Combine the warm water and molasses in the bowl of an electric mixer. Stir until most of the molasses is dissolved, then mix in the yeast. Let sit to proof the yeast for about 5 minutes, until the yeast has bloomed.
  2. Add the melted butter, flour, and oats (but not the salt) to the yeast mixture and stir together with a wooden spoon. Let rest for half an hour.
  3. Add the salt and using the dough hook, mix the dough for 6 minutes on medium. The dough is moist and will slap around the sides without sticking too much. If it does stick, add a tablespoon of flour until the dought comes away from the sides. at the end, to quote: "The dough should be s0ft and supple, slightly tacky,with a beautiful sheeting effect."
  4. Butter a bread loaf pan.
  5. Scrape the dough onto a floured surface and knead it a few times. Butter a large bowl (I just did a cursary rinse and oil of the mixing bowl), cover, and let rise in a warm place for an hour, until doubled in size.
  6. Turn the dough onto a floured surface, shaping it into an oblong form about the size of the loaf pan,  squeezing out the air. Shape it into a loaf by folding it over and pinching the edges together to form a seam. Fold under the ends, roll it around a bit, then put it into the buttered pan with seam side down. Let rise for another hour. During that time, preheat the oven to 400 F. 
  7. Bake for 40 minutes until the top is dark and it sounds hollow when thumped. (I baked it for closer to 50 minutes, and even then it did not turn as dark brown as the picture in the cookbook).

Sunday, May 15, 2011

Cake!

I'm not much of a baker, mainly because I like to eat the stuff that I bake and that's not good for me. But every once in a while comes an occasion that really needs a celebratory cake. My mother recently turned 85 and she is still game enough to travel, so when she came to visit me here in Holland a couple of weeks after her birthday I organized a little get-together for her. And the cake I made is an old family favourite—Black Forest Cake.

Sunday, April 17, 2011

Fish from Landmarkt

Yesterday I decided to check out a newly opened market/supermarket in North Amsterdam. They call it a covered market, but it is more like a supermarket that tries to concentrate on local produce, fish, and meat. At this time of year there is not that much local  produce yet, but the fish and meat counters were very well stocked and attractive, the bakery had great bread, and the service was super friendly.

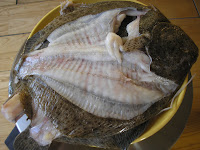
I bought an ugly fish (zeeduivel a.k.a. sea devil, monkfish, angler fish) and had them clean it and give me the head and bones so I could make some fish stock (a.k.a. fumet). They asked if I wanted some more fish carcases, so I came away with a couple of small turbots at no extra cost. Like I said, nice service.

After checking out some recipes and advice on the internet, this is the fumet I made. It turned out very flavourful, perfect for a lovely Italian fish soup that I plan to make soon. And that fish pie recipe I still need to perfect.

Fish Fumet

  • 1.5 - 2 kilos fish heads and bones of white-fleshed fish, such as founder, turbot, halibut, or cod
  • 1 large onion
  • 1 leek
  • 1 stalk celery
  • 1/2 fennel bulb
  • 3-4 mushrooms
  • 1 tablespoon butter
  • 1 tablespoon oil
  • 2 bay leaves
  • 12 white pepper corns
  • 1/2 teaspoon salt
  • 1 1/2 cup white wine
  • 6 cups water

  1. Remove the eyes from the fish heads (I know, not one the nicer tasks). Apparently, they can cause the stock to become bitter if they burst. I also removed the rather slimy, dark skin from the angler fish, as one bit of advice said that fish skin can also make the stock dark and cloudy. So can blood left in large veins in the heads, so soak the fish carcases in cold water for some hours, and then discard the water.
  2. Finely dice the onions, celery, leek, fennel, and mushrooms.
  3. Heat the oil and butter over medium high heat and when the foam from the butter subsides, add the vegetables,bay leaf, parsley, salt and pepper and give a stir.
  4. Add the fish carcases and cover for 5-7 minutes, until the flesh on on fish flakes. Basically the fish steams in its own moisture, along with the vegetable aromatics.
  5. Now add the wine a cook for a few minutes to allow the alcohol to evaporate.
  6. Then add the water. Bring to a gentle simmer and simmer for 20-30 minutes, skimming off the foam that rises to the surface.
  7. Place some muslin or several layers of cheese cloth in a sieve and strain the stock into another pot. Press down on the fish an vegetables to extract all the moisture and flavour.
  8. At this point, you can adjust the seasonings and use the stock in a fish soup or sauce, or freeze it. I decided to reduce it further to concentrate the flavour more (and reduce the amount I'd have to store in the freezer!)

Saturday, April 16, 2011

Kitchen Gadgets

You would think I have everything my little heart desires in the way of kitchen paraphernalia but I have found room for 2 new acquisitions that I have sort of been wanting—a mandolin and a small slow cooker.

I think the mandolin is my favourite of the two. Instead of being a full-fledged job with multiple blades and a box, and something to protect your fingers, and that costs almost a hundred euros (like the OXO deluxe mandolin), and which claims more space that I don't have in a kitchen cupboard, this is a simple hand-held plastic number with a ceramic blade that cost under 10 euros. And it just hangs on a rack when not in use. Since its acquisition I have been making thinly shaved salads almost everyday. My favourite is a fennel-cucumber salad.


As for the slow cooker, I have been sort of wanting one because they are great for cooking beans and stews unattended overnight or during the day while I am at work. The disadvantage seems to be that most of them are enormous. So when I recently saw a small one, I snapped it up. It was quite inexpensive, probably because it is missing the more sophisticated controls that you let set how many hours it should go for before going into keep-warm mode. Of course I only realized this when I got home. Nevertheless, I am finding it useful. In the photo, it has just finished cooking chickpeas (without soaking), which is pretty well my favourite legume.

Back to the fennel-cucumber salad, it's my own invention, inspired by Japanese sunomono salad. It is light and fresh, sweet and sour, and I eat for lunch several days a week. Anyone coming to dinner in the next couple of months is likely to be eating it. It may even win over people who don't like fennel!

Fennel-Cucumber Salad

  • 1 small fennel
  • 1/2 English (seedless) cucumber
  • 2 teaspoons fresh dill, finely chopped
  • 1-2 tablespoons fresh coriander, chopped
  • 1-2 teaspoons sugar
  • 1/4 cup apple vinegar

Thinly slice the fennel and cucumber. (I think having the vegetables thinly shaved, which is easiest to do with a mandolin, is really important in this salad.)
Toss together, add the herbs, sugar, and apple vinegar. (I am using a light apple vinegar, but apple cider vinegar or rice wine vinegar would also be suitable)

Sunday, April 3, 2011

Busy Sunday

Yesterday morning, a glorious sunny day, the first true spring day (20 degrees!), I found myself sauntering along the Albert Cuyp Markt—3 or 4 blocks of vegie/fruit, cheese, charcuterie, cheese, poultry, fish, and clothing vendors. Part of the pleasure of the market is the people watching, and the snatches of overheard conversations in that awful Amsterdam working class accent, lunch a sandwich from Tjin's Exotic Broodjes, poking into the Pittenkoning (one of my favourite kitchenware stores), and just reveling in the sun.

Needless to say, I came home with some goodies and today I spent the day cooking. I've cooked for the week and that has included:

  • Fish Pie, based on several recipes and trying to scale it down to a two-serving version. Not entirely successful, but there's a lot of promise and I want to work it out into something that really works.
  • Apple-Cranberry-Custard pudding. What would I get if I topped apple and cranberries, plus brown sugar, lemon, orange peel, cinnamon and black pepper (!), poured a sauce of egg, milk and some Birds Eye custard powder over it, and baked for half an hour? This was an attempt to cut some fat by using a custard instead of a crisp topping. It proved to be quite tasty, but may need even more custard. 
  • Osso Bucco, from Essentials of Classic Italian Cooking. Similar to one in our family cookbook, but without the porcini. 
  • Hummus, based on Jane Brody's version in Good Food Book. Unfortunately, I didn't have enough lemon juice, so I used apple vinegar, lemon peel, and sumac to get the balance right. I'm really liking what sumac does to it.
  • Red Pepper and Bean Spread, based on one from Smitten Kitchen, but with more garlic, quark instead of cream cheese, and red pepper flakes and sumac (instead of lemon juice) to punch it up a bit.
  • Moroccan Roasted Vegetables from Moosewood New Classics for a couple of lunches this week.
It was a lovely day!


Saturday, March 19, 2011

Local Food

The local food movement has reached the Netherlands! Today, as I came home from shopping (clothes, not food), I noticed a mini-market on the square in front of Studio K, the café associated with the cinema of the same name next to my apartment building. There was stew from the Veluwe (the mildy hilly area in the center of the country, home to woods, drift sand, and heather where deer and wild pigs still roam), local honey, artisanal bread, dry sausages, and flyers about a new online supermarket that will deliver mostly-local, mostly organic produce, meat and fish to your door. It's the initiative of a local couple from a distribution point in East Amsterdam (Watergraafsmeer).

My first order is already placed!   www.ruudmaaz.nl

Monday, March 14, 2011

Pork Cooked in Milk, with Bay and Cinnamon

Normally I stay clear of combining meat with milk. It's a combination that doesn't appeal to me (I will never choose Beef Stroganoff in a restaurant, for example). I'm not kosher about it--pepperoni pizza, here I come--but in general, I avoid it.

But to prove how goy I really am, this Spanish recipe for pork cooked in milk (from Moro) intrigued me and proved to be delicious. There is a plainer version in Essentials of Italian Cooking, and the Moro recipe also mentions using lemon zest and sage leaves instead of bay and cinnamon, so you could make lots of variations.

Basically, it involves browning a pork roast in a pot, adding milk and flavourings, and then simmering with the lid half off until the pork is cooked and still juicy, and the milk has evaporated leaving the remaining solids to caramelize into an almost cheesy sauce. It sounds simple, and it IS simple, but ...
I only had a small roast (about 500 grams) and, even though I tried to scale the recipe down, it took only 50 minutes to cook the pork and over 2 hours to evaporate the milk. This may have been a result of cooking the roast in a smaller pan, although I figured this was just part of scaling down the recipe. Fortunately, I had no guests and was not pressed for time. The result was tender and flavourful pork. The caramelized sauce is slightly sweet and subtly flavoured with bay and cinnamon. If you didn't know what it was, it would be hard to describe.

Lomo con Leche

Although this recipe reduced the meat and milk, I left the seasoning, bay leaves and cinnamon at the same amounts.
500 grams pork loin roast
1/2 teaspoon dried thyme
salt and pepper
2 tablespoons olive oil
3 cups milk
3 bay leaves
1/2 stick of cinnamon


  1. Season the outside of the pork with salt, pepper, and thyme.
  2. In a large heavy pot, heat the olive oil. When it is hot, add the pork and brown it on all sides.
  3. Add the milk, bay leaves, and cinnamon and bring to a simmer. 
  4. Turn the heat down and put the lid on the pot so that it is only half covered. 
  5. Simmer for 45 minutes to an hour, turning the pork from time to time.
  6. When the pork is cooked, remove it to a plate and cover with with tin foil.
  7. Keep the lid off the milk, raise the heat slightly, and continue simmering until the milk has reduced to a thick brown sauce.
  8. At this point, you can add the pork again to reheat it, before taking it out to serve with the sauce on the side. (Or you can just reheat the pork in the microwave.)

Friday, March 11, 2011

Garlic-Saffron Roast Chicken

Several weeks ago I put a gift certificate towards a new cookbook: Moro: The Cookbook. Moro is a restaurant the focuses on flavours from Spain, North Africa, and the Middle East. I'm not that keen on Spanish cooking as experienced in restaurants, at least the ones I've been to in my one trip to Spain. It's very meat-heavy and they don't understand that ham should not be part of a salad for vegetarians. (In contrast, the home cooking at Villa Matilde , where we stayed, was fabulous.) But I love North African food and would like to discover Spanish food that I like, hence the new cookbook.

All this is leading up to a recipe that was not in the cookbook! I started out seasoning a chicken a day in advance to make Zuni roast chicken, but on the day decided I wanted to do something new. Moro had a recipe for Chicken Stuffed with Garlic and Coriander. I didn't have coriander, but the rest of the recipe sounded intriguing so I made it without and served it to my guests that evening, followed by Casablanca Oranges (Jane Brody's Good Food Gourmet) for dessert, made with blood oranges and clementines.

Garlic-Saffron Roast Chicken

Besides omitting the coriander, I also left out the olive oil from the garlic paste. I reserved the milk to make a gravy, and followed the Zuni method of cooking the chicken in a preheated cast iron skillet. The dish was tasty and looks lovely, but I actually found the saffron flavour too strong and the garlic not intense enough. Worth trying again with coriander though.

1 medium chicken
1 tablespoon salt
3 garlic bulbs
1 cup milk
1 generous pinch saffron
1 1/2 teaspoons ground cumin


  1. A day or two before you serve, thoroughly dry the chicken. Gently slide your fingers under the skin and loosen it. Rub the salt in all over the chicken, then put in a plastic bag and let it baste itself in the fridge until several hours before you plan to cook. This is a dry brine that lets the chicken marinate in its own moisture and gets the meat well seasoned throughout.
  2. Several hours before cooking, take the chicken out of its bag and let it air dry. 
  3. Preheat the oven to 220 C/425 F.
  4. Meanwhile, break the garlic bulbs into their cloves and put them in a small saucepan with enough milk to cover by about an inch. Cook gently for about 25 minutes until the cloves are soft. 
  5. Soak the saffron in 2-3 tablespoons of the warm garlic milk.
  6. Meanwhile, remove the garlic, and squeeze out the cloves from the skins. Mash the cloves into a purée, along with the ground cumin and saffron milk. (I used the small blender of my immersion blender.)
  7. Using a teaspoon and your fingers, put the garlic-saffron paste under the skin. Try to get it around the thighs as well as the chicken breast.
  8. Heat a cast-iron skillet that is large enough to fit the chicken. Put the chicken in, breast-side up, then put it into the oven.
  9. Cook for 20 minutes, then turn the chicken over, breast-side down.
  10. Cook for another 30 minutes and flip the chicken breast-side up again.
  11. Cook for another 15 minutes or until the juices run clear or the thigh join is very loose. (I like chicken well done.)
  12. Remove the chicken to a platter and cover with foil to rest for 10 minutes.
  13. Drain all but a tablespoon of the fat from the skillet. Over medium heat, add a tablespoon of flour, stirring and scraping up the brown bits. When the flour is browned, slowly add the garlic-milk until the sauce reaches the desired consistency. You can add water if it is still too thick.
  14. Cut the chicken into pieces and serve with the gravy on the side. I served it with a rice pilaf and roasted broccoli and tomatoes.


Saturday, March 5, 2011

Beef Rollade Braised in Tomato-Onion Sauce

I'm gradually making my way through the free-range beef in the freezer, and it is forcing me to explore new territory.  I love stews of all kinds, things that require long slow cooking and imprecise timing, and ground meat is flexible and easy to handle, but steaks and roasts are terra incognita for me. My experience with steak several weeks ago was not that positive, so it was with some trepidation that I turned my hand to the cuts of braadstuk (literally, roasting piece).  Of course, I ratcheted up the tension by inviting someone for dinner too.

I found the basic recipe on the internet (Braadstuk in tomatensaus), but adapted it in several ways:

  • Reduced the tomato sauce quantities by a third
  • Reduced the butter and oil that went into it by two thirds.
  • I had only two smallish pieces of beef totaling 300 grams instead of a single cut of 800 grams. Rather than cook them individually, I decided to roll them together in a rollade with a stuffing between them.
  • Added a fennel bulb that I happened to have on hand 
  • Added bay leaves and herbs to the sauce, trying to balance the sweetness
There are things that I would do differently next time, though:
  • Adjust the balance between the tomatoes and the onions. I found that caramelizing the onions made the sauce overly sweet. Reducing the onions and/or increasing the tomatoes would help. Or perhaps letting only half of the onions caramelize and adding the rest with the tomatoes.
  • Prepare the beef rollade the day before and season it with salt and pepper. By letting it marinade with the salt in its own moisture, the meat would have been better seasoned. I found the end result rather bland.

Beef Rollade

Serves 3-4


300 grams beef, in two pieces
2 tablespoons dried porcini mushrooms
1 sun-dried tomato
3 tablespoons fresh parsely
2 cloves garlic
1/2 teaspoon salt
pepper to taste
  1. Soak the mushrooms and sun-dried tomato in hot water for 15 minutes.
  2. Drain them, reserving the soaking liquid, and chop finely with the garlic and parsley.
  3. Season with salt and pepper.
  4. Place the mixture over one piece of meat, then put the other on top of it.
  5. Using kitchen string or twine, tie the pieces together. (You can do this by cutting individual lengths of string and laying the beef on top of it and tying the individual pieces, or you can use one long length, wrapping as you go. For instructions see this video. There's a bit of spoken Dutch (or Flemish, judging by the accent), but the visual says it all.


Tomato-Onion Sauce

This yields about 6 cups of sauce—too much for this meal, but it makes a great pasta sauce that can be used in subsequent meals.


50 gram butter
2 tablepoons oil
4 large onions, chopped
1 fennel bulb, chopped (optional)
2 chili peppers
1 small bulb garlic
1 teaspoon salt
1.5 kilos tomatoes
500 ml red wine
2 bay leaves
1 teaspoon dried basil
parsley to garnish

  1. In a large heavy pot, heat the butter and oil over medium high heat. When the foam from the butter subsides, add the beef rollade. Turn it every few minutes until it is nicely browned on all sides (aproximately 10-15 minutes).
  2. Remove the beef to a plate, let cool, then cover and refrigerate while the sauce cooks (3-4 hours).
  3. Add the chopped onions to the fat, stir thoroughly, turn down the heat to low, and let the onions cook uncovered for one half to three-quarters of an hour. Stir every 10 minutes or so, scraping up any browned bits.
  4. Meanwhile, mince the chili peppers: chop one complete chili pepper, including the seeds, but scrape out the seeds of the other and mince only the flesh (unless you like your sauce very hot).
  5. Separate the cloves in the garlic bulb, smash them and remove the outer peel, then mince the garlic with the salt.
  6. When the onions are thoroughly browned and carmelized, add the minced chili peppers, Stir and cook for 2 minutes or so.
  7. Add the chopped fennel, then stir in the minced garlic.
  8. Add the red wine and the reserved mushroom soaking liquid.
  9. Add the whole tomatoes, then cook the sauce, uncovered, for two hours. By this time, the tomatoes will be soft and have mostly subsided into the sauce. Use a potato masher to break up and smash the tomatoes into the sauce.
  10. Add the bay leaf and herbs and cook over low heat for another hour. 
  11. While the sauce finishes cooking, take the meat out of the fridge to bring it to room temperature. About 40-50 minutes before you want to serve, add the beef to the sauce, cover and cook over low heat. For medium rare, cook for 30 minutes (or use a meat thermometer to determine how when ti's done to your taste).
  12. Remove the meat, cover loosely with tin foil, and let rest for 10 minutes before slicing and serving it with the tomato-onion sauce. Serve with pasta and a steamed green vegetable, such as broccoli.

Sunday, February 13, 2011

Cooking Sundays

Sundays tend to be the day I cook for the rest of the week. Saturdays are spent in errands, or lazing around recovering from the work week, or browsing through recipes planning things I'd like to try. But Sundays I get up, bright-eyed and bushy-tailed, ready to cook. Today the agenda called for polpettini, eggplant curry, a lamb stew or curry, and deviled eggs (for the apartment potluck reception  this afternoon).


Polpettini

This is a recipe slightly adapted from a contribution my sister and brother-in-law made to our family cookbook. The amount made here will make about 18 meatballs (3-4 servings), but you can easily double the recipe.
  • 1 tablespoon porcini mushrooms
  • 1/3 cup warm water
  • 260 grams ground beef
  • 1 cloves garlic, minced
  • 2 tablespoons fresh parsley chopped
  • 1/4 teaspoon dried basil
  • 1/2 beaten egg
  • 3 tablespoons bread crumbs
  • 1 tablespoons Parmesan cheese freshly grated
  • salt and pepper
  • 2 tablespoons olive oil
  • 1 onion very finely chopped (divided)
  • 1/3 cup dry white wine
  • 1 tomato, chopped
  • fresh parsley, to garnish
  1. Soak the dried mushrooms in the warm water for 15 minutes. Lift them out of the water and chop finely. Reserve the soaking water.
  2. In a mixing bowl, combine the meat with the chopped mushrooms, half the chopped onion, garlic, and herbs. Stir in the egg. Add the breadcrumbs and Parmesan, and season with salt and pepper. Form the mixture into small balls containing about 1 tablespoon each.
  3. In a large heavy frying pan or skillet, heat the oil. Add the onion and cook over low heat until soft. Raise the heat and add the meatballs, rolling them often to brown evenly on all sides. After about 5 minutes add the reserved mushroom water. Cook for another 5-8 minutes, or until the meatballs are cooked through.
  4. Remove the meatballs to a heated plate with a slotted spoon. Add the wine to the pan and cook for a minute or two,  stirring to scrape up any residue on the bottom of the pan. then add the chopped tomato and reduce the sauce by about half.
  5. Pour the sauce over the meatballs , garnish with parsley, and serve with pasta or potatoes.


Bharta (Curried Eggplant)

One of my staple vegetables is eggplant. I love it in almost every imaginable guise—in baba ganough, in lamb stew, roasted, grilled, you name it, I love it. Yesterday I bought a package of three smallish ones, so I was on the hunt for some new recipes to use it up. The recipe I ended up using comes from an old cookbook that I was considering getting rid of. But this looks like it might be a bit premature, given how good this curried eggplant was!

Adapted from The Cooking of India

  • 500 grams eggplant
  • 2 tomatoes, chopped
  • 2 tablespoons fresh coriander, chopped
  • 1 teaspoon coriander seed
  • 1 teaspoon cumin seed
  • 1/2 teaspoon turmeric
  • 1/4 teaspoon chili flakes or small dried chili
  • 1 tablespoon oil
  • 1 teaspoon butter
  • 1 clove garlic, minced
  • 1 teaspoon fresh ginger, minced
  • 1 onion, chopped
  • salt
  • 1 teaspoon garam masala
  • fresh coriander for garnish

  1. Preheat the oven to 210 C/450 F.
  2. Score the eggplants with evenly-spaced, 3 cm gashes, about 1 cm deep, on opposite sides of the eggplant. Place in a baking dish and bake in the oven for about 1 hour, turning them after 30 minutes.
  3. Meanwhile, grind the coriander seed, cumin seed, turmeric, and chili flakes into a powder. (I use a coffee grinder).
  4. When the eggplants are very tender, take them out of the oven, cut them in half and scoop out the flesh. Chop coarsely and put in a bowl with the tomatoes, half the onion, half the garlic, and the spice mixture.
  5. In a large frying pan, heat the oil and butter over moderate heat until the butter foam subsides. Add the garlic and stir for 15 seconds. Add the ginger and stir for another 15 seconds.
  6. Add the onion and cook for 2 minutes, stirring constantly, until they are soft but not brown.
  7. Add the eggplant mixture and continue to cook and stir until most of the moisture is evaporated (about 10-12 minutes).
  8. When the mixture masses together, drawing away from the sides and bottom of the pan, transfer it to a serving dish, sprinkle the garam masala over it, and garnish with chopped fresh coriander.
  9. Serve with rice, chapati, or naan and some dal.